Oracular Arts and Crafts: A Rune Casting Tapestry
I took a basic tapestry weaving class with the delightful Lou Grantham, proprietor of San Francisco Fibre, in August. So of course I know everything about how to weave a tapestry now! (Cue raucous laughter from offstage.)
As with all arts, weaving is best practiced by doing it. I’m certainly not ready to take on something like this:
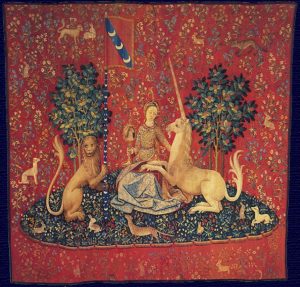
The Lady and the Unicorn – Sight
So I’m going to start with something a bit less complicated—and smaller! At first I was going to do a bindrune as the perfect choice—it has interesting shapes, but it is all angles, no curves, so it’s easier to weave. (I chose a circle as my first shape to try in the workshop—um, wow. So I’m starting with angles, as the conjunction of straight lines is less complicated to create than the appearance of a curve.)
Here we have ALL THE THINGS needed for the project:
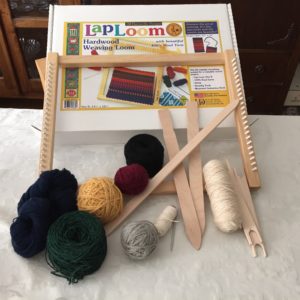
All the Things!
The first step is to string the loom to create the warp. This goes fairly quickly; it’s the tuning and tightening of the strings—somewhat like tuning a harp with just one note—that takes the time. Et, voilà!
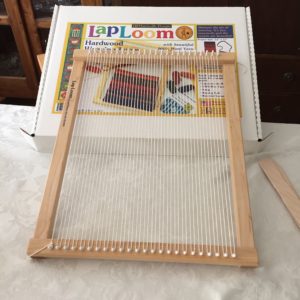
The Well-Strung Loom
So then it was time to make the pattern. HahahahaHA. Ha. HA. A bindrune is very easy to draw with pencil or ink. Taking that same set of shapes and enlarging it to fit the loom—not so much. I clearly need more practice at pattern drafting. So, Plan B: something less complicated.
I decided to make a casting cloth (tapestry? rug?) with colored borders corresponding to the four directions. Not as fancy as a bindrune, but something I can do at my current level of experience. I chose colors, and went to sketch the pattern.
Geometry is not my strong suit. Never has been. I have no depth perception, so trying to do geometry is . . . challenging. It took two hours, because having to allow for the edges that are in the weaving but which don’t show once you attach the pattern was a pain. But, I did it! The pattern doesn’t look like much, but it’s going to be helpful—the lines of the graph paper I used match exactly to the warp, which is going to make everything much easier.
Unless one is a weaving genius (which I am not, at least, not yet), one needs to have the design at the back of the loom as a pattern. Some people pin the pattern to the warp, but I’m going to try working with it taped to the back of the loom to see if that’s less complicated. I did it with the pattern pinned to the loom, but I kept knocking it off as I wrestled the shuttles. I’m hoping the tape will be more effective, as well as hoping that my shuttle technique will improve!
Here’s the loom and pattern, set up and ready to go!
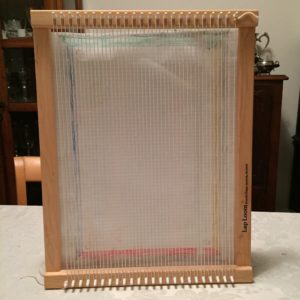
Loom with Pattern Taped to It
Weaving is time-consuming, so this is going to be a longer-term project than the clay runes I made at Winter Solstice last year. I’m choosing to do this now during a period where I won’t be traveling, so I can focus some time on it each week. I’ll post regular updates, of course, so do check back!
In the meantime, if you are interested in learning more about weaving, and are fond of historical fiction, I highly recommend Tracy Chevalier‘s book, The Lady and The Unicorn. She’s an excellent writer and the story is fascinating, even if you aren’t a weaver!
